joi, 15 noiembrie 2012

OpenWRT - Serial console recovery on TP-LINK MR 3420

      Romanian short version following - for English version, skip reading the Romanian version :)

***rezumat in limba romana***
Daca ai setat gresit adresele IP ale unui router TP-LINK MR3420 (in cazul de fata), nu mai poti accesa routerul, ca si cum ai ramane incuiat pe dinafara.
Articolul prezinta deblocarea unui router TP-LINK MR3420 care are OpenWRT instalat, folosind conexiunea seriala. Se construieste un cablu USB - serial dintr-un cablu de date gen DKU-5, folosit pentru celulare Nokia, apoi se lipeste / cositoreste un conector pereche pe placa electronica a routerului pentru portul serial al routerului TP-LINK MR3420.
Detalii despre softul utilizat (free si open source), mai jos, in engleza (utilizati Google translate pentru clarificari).
*****

If you like hacking devices, then you may end up on situations when it is mandatory to remove covers in order to get the device up and running again. Of course you will lose warranty, but this is part of the game, right?
Situation: I got a nice TP-LINK MR3420 WiFi router with a USB port. The initial distribution loaded on this router makes possible to use the USB port only to connect a USB 3G dongle to back-up your data connection. Pretty flat, when you can get much more from the USB today.
Fortunately the open source community those days is wide spread and covered even embedded field: OpenWRT is a development community working on firmware for various router models. Similar is DD-Wrt and many others. I used OpenWRT due to the fact that they offered more flexibility on what I want to achieve from that router. And maybe because I found first about them :)
Let's start:
I downloaded and followed the step by step tutorial in order to change my router to OpenWRT. Easy job, you cannot fail.
A ton of options became available, maybe too many. Somehow I wanted to connect that router to my old one and I messed-up my IPs and the result was that I was locked outside. Like when you locked your car's keys inside and you are in the middle of nowhere :)
I did my best to get back the control over the device - negative. No method to recovery, no fail safe, no IP sniffing. So I jumped to the serial console recovery.
Long story short: you need to connect to the router main board a cable and from that cable to command the router to behave the way you want.
First you need the cable: USB to serial (logical levels 3,3V). I bought a cable from DealExtreme.com (DKU-5 type like this) and I modified it in order to be able to connect myself to the router's serial port. Open the USB case to identify the wires: Tx, Rx and GND. Rx must go to serial Tx on the router, Tx must go to serial Rx on the router. Also identify in advance the pins on the router, you need to align build the cable to fit them.

USB cable - new. Cut the end which goes to the cell phone

Use a pull-up resistor of 10k Ohm between Tx and Vcc of the cable. Solder a 4 pins female header 2.54 mm and use some hot glue to stiffen the connection

Solder the USB cage to the PCB, ensure that the wires are also soldered to the PCB

Here is the connection you need to follow in order to have a working cable. Again: make sure that the pins are fitting the connector from the router's PCB

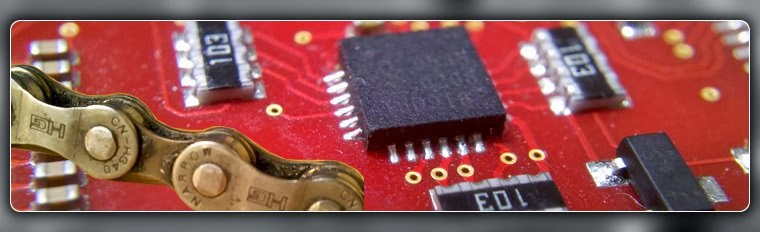
After that step, I soldered a 4 pins header male connector on the main board of the router - instructions can be found on the OpenWRT site. They will fit my cable: Rx on router goes to Tx on cable, Tx on router goes to Rx on cable and GND to GND.

Identify the serial port on the router MR3420 PCB. There you have to solder the 4 pins header.

Soldering the header

Cable connected to the serial port of the router. Make a sign on the connector in order to avoid reverse connecting (this solution is not error proof or poka-yoke)

It was cumbersome to find a driver for the cable, the cable is a classic USB to serial using PL2303 chipset from Prolific (annoying name - I lost time, it wasn't prolific at all). After you find the right drivers for the cable, move to the next step.

After the drivers were installed, Windows will report the PL2303 cable as COM18 (on my situation it was 18, may differ)

Setup the serial connection as indicated in the image

Download PuTTY application and connect to the serial converter using following setup:

Open PuTTY and connect via serial using the mentioned setup. You may save that configuration for future use.

Now you are connected to the OpenWRT router via serial console

After that some strange characters should show on the console, that is good, but the cable is poor. Here I stopped, but I was helped by Sorin - thanks!
write following commands in order to reset to factory defaults:

firstboot && reboot

After that, the router will reboot and you have to use PuTTY again, this time Telnet to connect to the router to 192.168.1.1 . Give following commands to setup root password (write it somewhere in order to have it in case you forget it):

passwd

From this moment on, telnet is not accessible anymore, use PuTTY and SSH or web interface (via Internet browser) to connect to the router, user name is root and password is the one given via telnet and the one you wrote it down. Do you remember it? :)

Hurray! Back in control of your router via web browser interface or SSH

After root login, we can access the multiple options of the router. enjoy

From now on you can start to unleash your router, basically this is a small computer with a Linux distribution and you can connect an USB hub and to that hub you can attach a webcam to have an IP cam, an external USB memory stick, a USB hard disk to share files, you can connect a printer to share it over network and many other things.
Follow-up on this article, soon a webcam will be attached to the router.

miercuri, 14 noiembrie 2012

Mirosul urat din baie - sifonul de pardoseala e de vina :)

 Se pare ca interesul pentru acest articol este foarte mare, adica multa lume se confrunta cu aceasta problema. Am gasit un clip pe YouTube unde se prezinta clar mecanismele care sunt in interiorul unei instalatii de canal, este in engleza, dar pe YouTube este si varianta de adaugat subtitrari in romana (ceea ce se traduce este foarte amuzant :) )


***********************
Cateodata nu sti care e faza: in baie miroase urat si tu nu ai nicio vina :)
Hai sa vedem de unde vine mirosul asta: in principiu vine de la canalizare desi tot in principiu calea spre canalizare este blocata de un dop de apa - sifonul. Am sa incerc sa explic simplu cum sta treaba cu sifonul asta:
-la chiuveta ori la vasul de toaleta, calea pe care apa o urmeaza este ca un "U" - permanent in acel "U" este apa care blocheaza aerul din canalizare sa ajunga la nasul nostru (partea cu albastru simbolizeaza apa)

Sifon de chiuveta - imagine de pe Wikipedia - modificata

-la cada de baie ori la pardoseala exista tot un sifon insa acesta are un capac care sta peste gaura de evacuare; in corpul sifonului trebuie sa fie apa astfel incat sa fie dopul de apa de care vorbeam mai inainte.

Sifon de pardoseala - apa creste peste nivelul h si curge in canalizare

-mai este legatura de la masina de spalat rufe - acolo iarasi este sifon sau o valva speciala cu o bila - deci in principiu si aici la prima folosire, furtunul de evacuare se umple cu apa si se face sifonul sau daca are valva cu bila, nu respira.
Asa ca iei la rand tot ceea ce este legat la canalizare: WC-ul, chiuveta, sifonul de pardoseala, sifonul de la dus / cada, evacuarea de la masina de spalat rufe. La WC si la chiuveta nu prea si ce face, ele din constructie sunt cu sifon care se umple cu apa la prima utilizare.
Ajungem la sifonul de pardoseala: luam capacul metalic si verificam daca are dop de plastic si apa. La mine nu avea apa, era cu mizerii de la renovare. Dupa ce l-am curata, am pus apa, lasi sa curga apa in sifon si vezi ca nivelul nu creste, apa se scurge in canalizare.
Si totusi inca mai miroase, a mai ramas sifonul de la dus (in cazul de fata tot un sifon de parodseala). Aici dupa ce luam capacul metalic, surpriza: lipseste dopul de plastic!

Sifonul de pardoseala cu capacul metalic pus

Sifonul de pardoseala cu capacul luat si cu dopul de plastic lipsa

La magazin nu au dopuri separat, se rezolva simplu: cumpari un sifon, iei dopul si ai rezolvat treaba! Simplu, nu?

Stop: esti timpit sau esti roman? Esti roman, asa ca mergi din nou la magazin si cumperi un dop de plastic pt tevile de canalizare. Costa vreo 50 de bani sau ceva de genul.
Dopul in cauza il ie si il modifici astfel incat sa arate ca dopul de care ai nevoie:

Asa arata dopul de plastic - originalul - are 4 picioare care il tin ridicat astfel incat apa sa curga pe sub el

Stanga: capacul de teava din care urmeaza sa facem copia dupa dopul de sifon din dreapta

Produsul finit

Dupa care il pui la sifon, lasi sa curga apa, verifici ca merge si apoi pui la loc capacul metalic.
Si uite asa ai scapat de mirosurile neplacute din baie.
Sifonul fara capac / dop - se vede gaura prin care vine mirosul urit de canalizare

Copia dupa original - merge, pardon, curge :)

PS: daca totusi mirosul persista, ghinion, fie e de la vecini, de la bloc, fie ai o gaura in vreo teava de canalizare (mirare ca nu curge "zeama" pe acolo).
Sifonul cu dop, apa si capac metalic pus

EN: Find and fix the bad smell in your bathroom - check siphons and replace missing cap from floor siphon with a regular plastic pipe end tap. Or put water into the siphons

luni, 12 noiembrie 2012

Fixare surub cu diblu in beton - gaurire fara mizerie

Pe e-mail primesti multe lucruri, unele chiar sunt interesante si merita aplicate in rezolvarea unor probleme de care ajungi sa te lovesti in viata. Numai sa iti aduci aminte la momentul oportun...

Trebuie sa agati ceva pe perete? Ai nevoie sa guaresti un perete? Nu ai chef sa faci mizerie? Citeste mai jos!

Gauritul unui perete presupune sa faci mizerie, caci materialul pe care burghiul il scoate din perete, cade pe jos, se prelinge pe perete. O solutie ar fi un adaptor care se pune la capatul furtunului de la aspirator si care absorbe praful in timp ce dai gaura, am asa ceva si nu mi se pare foarte practic, poate in anumite situatii este util. E o solutie care poate smulge zugraveala, poate fi usor incomod, ai nevoie de aspirator, poate de cineva care sa te ajute etc. Acum ceva vreme am primit pe mail o serie de poze cu idei practice numai bune de aplicat, iar una dintre ele se referea tocmai la subiectul cu gauritul peretilor. Si uite ca s-a ivit ocazia: am avut de bagat un diblu intr-un perete de beton. Asadar luati o foaie de hartie, spre exemplu o jumatate de A4 (A5), indoiti-o la jumatate pe lungime.

O jumatate de coala de hartie A4 (A5)

Se indoaie coala pe lungime

Se foloseste o bucata de banda adeziva de hartie (de protectie cand se vopseste)

La final asa ceva trebuie sa iasa


Pe una dintre latimi, puneti o banda adeziva de hartie, jumatate sa fie lipita pe coala noastra. Lipiti acesta hartie sub locul unde doriti sa gauriti astfel incat praful sa cada in hartie.

Gauriti si praful nu cade pe jos

Lipiti banda cu hartia indoita sub locul unde gauriti

Dati gaura, apoi cu o pensula curatati peretele si apoi cu grija dezlipiti banda de pe perete si luati hartia. Simplu si curat!
PS: puteti utiliza si o foaie Post-it pt acelasi scop.

Gata!

Clean concrete / wall drill, no dirt / dust on the floor, just use a folded paper with adhesive tape or a post it paper